
Ok - I keep a lot of tanks, mostly for guppies and platys, but recently ive become interested with shrimps neocaridina kind of shrimps. The most common one are the red cherry shrimps [a.k.a RCS] which are very hardy, ive started of with around 50 juvys, they reached around 200 at some point and they are back to 100+ due to fish eating em - I want to keep the shrimp population while while creating more space for anubias and ferns [new interest of mine].
To start off, im staying in an apartment and the tanks are in the laundry area, very tight space. Here is the space so far [no this is not a petshop haha]


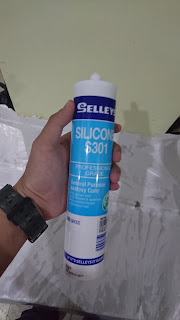
Talking about the sealant im using this, yes its a mistake I took the wrong color [black, proffered is clear]


To start off, im staying in an apartment and the tanks are in the laundry area, very tight space. Here is the space so far [no this is not a petshop haha]

This has improved a bit over the last few months [with a lot more mess and cob webs].
So my plan is to built an overhead sump for those black containers, the sump will serve two purposes, first is the sump for the guppies below and second as a home for my shirmps [a good idea? na maybe, lets try it anyway].
Im cheap AF! I dont wanna pay for extra power so I was thinking that the best way to power this pseudo sump is by airlift pumps. The sump is 29 inches long 9 inch high and 6 inches wide, for it to be cheap the bottom glass is 1/4 while the rest of the side are 1/8 inch of glass. The bottom glass also has 2 x 12mm holes, one intake and another drain - i apologize for mixing meter-based and inch-based measurements in one paragraph ;)

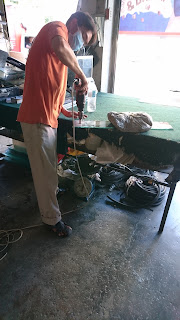
Here's the guy who cut the glass and drilled the holes [matsalam kuya!]

Here's the glass:

First things first, we need to wipe clean the edges - the sides were sanded the powder needs to be wiped clean to avoid affecting the sealant.


Clean the silicone gun before using :)

Some of these has a cutter for the sealant just like this one

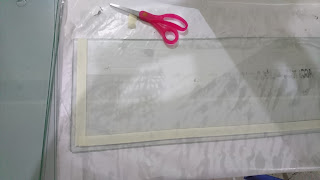
Before assembling the glass we need to use this magic thing

Place it around the edges of the glass leaving the area where you want the sealant to stay, this is to avoid non uniform application - im using this coz im messy.


Assemble and put in supports like this:

Now lets wait for a while for the sealant to cure... will update you when they are ready..


ERP Software Development Company
ReplyDeletecustom CRM software development
CRM application development
Custom CRM development services
custom CRM software development
Odoo Application Development
Odoo Application Development
Ecommerce Development Services
Custom Ecommerce Solutions
ecommerce web development services